Page 74 - DMGT206_PRODUCTION_AND_OPERATIONS_MANAGEMENT
P. 74
Unit 4: Quality Control


          3.   Cycling of data can indicate that temperature or other recurring changes in the environment;  Notes
               differences between operators or operator techniques; rotation of machines; or differences
               in measuring or testing devices being used.
          4.   Several points near a warning or control limit.
          In addition, care needs to be exercised when two of three consecutive points are outside the
          2-sigma warning limits but still inside the control limits. This may be the result of a large shift
          in the process in the equipment, methods, materials, or operator or a shift in the measurement
          system. Even when four of five consecutive points are beyond the 1-sigma limits, it should be a
          matter of concern. Vigilance ensures that we prevent defectives and not just identify defectives.

          4.2.4  Control Charts for Variables

          Many quality characteristics can be expressed in terms of a numerical measurement. A single
          measurable quality characteristic, such as a dimension, weight, or volume, is called a variable.
          Control  charts for  variables are the most extensively used control charts in industry. They
          usually lead to more efficient control procedures and provide more information about process
          performance than do attributes control charts.

          Constructing charts for means (µ) and X bar chart using MS Excel: The R chart is developed from
          the ranges of each subgroup data, which is calculated by subtracting the maximum and  the
          minimum  value in  each subgroup.  An example showing  the development of  the charts  is
          provided.
          Let us take an example showing the procedure for making X bar and R Control Charts. We have
          discussed the specifications of the steel shaft in an earlier section. Let us consider the measurements
          taken on the diameter of the shaft.  The aim is to achieve statistical control of the diameter using
          X bar and R charts. Measurements of the diameter of ten samples, each of three units, have been
          taken when the process is assumed to be in control.
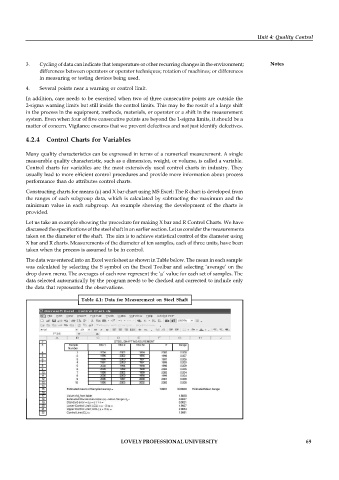
          The data was entered into an Excel worksheet as shown in Table below. The mean in each sample
          was calculated by selecting the S symbol on the Excel Toolbar and selecting ‘average’ on the
          drop down menu. The averages of each row represent the ‘µ’ value for each set of samples. The
          data selected automatically by the program needs to be checked and corrected to include only
          the data that represented the observations.

                              Table  4.1: Data  for Measurement  on Steel  Shaft


                                           LOVELY PROFESSIONAL UNIVERSITY                                   69

